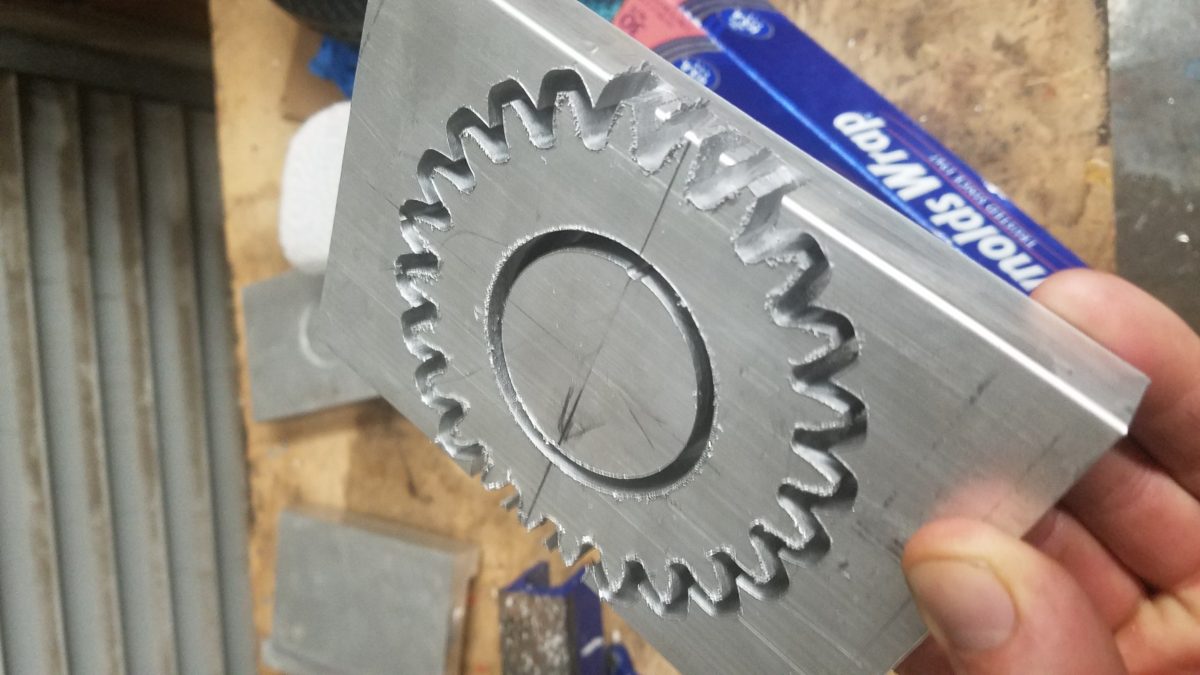
The featured picture for this post is actually a cnc project where my end mill broke moments before completing. But if you’re an android developer you probably have had the little gear icon in your email inbox or more recently emails from fabric.
Scroll down to the bold title to skip my rambling musings.
These are amazing tools but I ran into a problem that I couldn’t handle with these tools. I was creating a new revised method/function within my app that generates a string for the user to read. I wanted the new method to produce the exact same result as the old method when handling old type situations, plus it needed to handle some new situations as well. After building it and debugging I found that it produced the exact same string 99.996% of the time. This variation appears to unavoidable. Even better I can use the old method 99% of the time thus making the chances that the user encounter this error non-existent.
Not foolish enough to make assumptions I deployed my new method invisible to the user and using fabric waited for my “events” to register showing a similar match rate. Once I had confidence that th match rate matched my testing I would make the switch visible to the user.
Much to my surprise the match rate was way lower. .. around 50%. I went through and made sure that everything was right. I then added a custom attribute to show me both strings. This is where my problem arose. Fabric truncates strings and custom attributes from the same event are split up in the online review area. The data was almost useless.
— So I decided to make my own poor mans version. Here’s how i did it. —
On the android side I used the Volley Network. Once imported I made the standard volley pattern which can be accessed statically. Volley is awesome.
public class VolleyNetwork {
private static VolleyNetwork mInstance;
private RequestQueue mRequestQueue;
private static Context context;
private VolleyNetwork(Context contex)
{
context = contex;
mRequestQueue = getRequestQueue();
}
public static synchronized VolleyNetwork getmInstance(Context context){
if (mInstance == null){
mInstance = new VolleyNetwork(context);
}
return mInstance;
}
public RequestQueue getRequestQueue() {
if (mRequestQueue == null){
mRequestQueue = Volley.newRequestQueue(context.getApplicationContext());
}
return mRequestQueue;
}
public <T> void addToRequestQue(Request<T> req)
{
req.setShouldCache(false);
getRequestQueue().add(req);
}
}
I was already using the volley class above to make reports to my server. Now I added a new class for my “home brewed version of fabric”. As you can see this static method report_Mismatch() has all the data needed to use volley and make a report to your server. I’m using a simple password because the worst a hacker could do with this info is post irrelevant strings to the server .txt file. The “key1” attribute is how my server knows what type of data is coming in. Is it a custom error report? Or is this for some other process completely.
public class Reporting {
private final static String TAG = "Reporting";
public static String MY_PREF = "com.yourname.yourapp";
final public static String SERVERADD = "http://yourserver.com/server/";
final static private String typeOne = "passwordp1";
//report clock in/out status by updating my row - no feedback
public static void report_MisMatch(final Context context, final String myReportData )
{
Log.d(TAG, "report_MistMatch: ");
final String mTag = "report_MisMatch"; //if frequently use volley network to post different things the origination of the response needs to be tracked
StringRequest postRequest = new StringRequest(Request.Method.POST, SERVERADD, new Response.Listener<String>() {
@Override
public void onResponse(String response) {
Log.d(TAG, mTag + "onResponse: " + response);
Log.d(TAG, "onResponse: sent");
}
}, new Response.ErrorListener() {
@Override
public void onErrorResponse(VolleyError error) {
Log.d(TAG, "onErrorResponse: error");
}
})
{
@Override
protected Map<String, String> getParams()
{
Map<String, String> params = new HashMap<String, String>();
params.put("key1", "somedata");
params.put("report", myReportData);
params.put("gentypeone", getLoginCredentials(context));
return params;
}
};
VolleyNetwork.getmInstance(context).addToRequestQue(postRequest);
}
//These will be retreived for all functions
private static String getLoginCredentials(Context context)
{
String[] data = new String[4];
SharedPreferences myPref = context.getSharedPreferences(MY_PREF, Activity.MODE_PRIVATE);
return new String(typeOne + "randomly_generated_passkey");
}
}
On the server side my code was already written due to other server feature. Its php because for literally no money you can setup a server/web address to provide back end app support. These type of low cost servers usually always have php/mysql. Im thinking of transitioning to digital ocean but it seems like a lot of work and I’m lazy.
A bit of backstory on my experience. I wrote these blog posts because it seemed there are reference manuals written by experts for experts with no bridge for the beginner to cross relating to these subjects. This article plus the resources I mentioned in the first post and in this page is everything I used. If you read this blog please leave a comment and say hi. I will get great satisfaction knowing it helped you out!
Even still, when your bit shifting and copying buffers you may make a small error. With 150k byte nalus coming in every 32ms you might get a little overwhelmed if your just starting.
You might start feeling like this
FFmeg
FFmpeg is what a lot of people are using. It comes wrapped up in javacv so I touched on it a bit already. But the documentation sucks so let me show you how to use it real fast.
Download the build for your machine. I’m using windows so I download a compressed file and extract it to my program files folder. Then I must set my system path so I can use command line. Search internet on command line installs if you don’t understand as that’s a whole other topic in itself.
2. Navigate cmd line to folder with video and use this command to send a udp stream.
If you have a udp socket open you can see hex output or play the video. If you use a saved video from you android device this is a great way to make sure your receiving code is correct. For fun replace h264 with mpegts and write it to hex. Or change the libx264 to copy.
Writing to hex
Creating useful data from your test streams
public class FFStream {
private final String TAG = "FFStream";
File file;
DatagramSocket socket;
boolean shouldListen = false;
BufferedWriter writer;
public FFStream()
{
// get the file to send debug info to
FileChooser fileChooser = new FileChooser();
file = fileChooser.showOpenDialog(null);
if (file == null){
return;
}
createSocket();
try{
writer = new BufferedWriter(new OutputStreamWriter(new FileOutputStream(file), StandardCharsets.UTF_8));
}catch (IOException ioe){
System.err.println(TAG + " cons " + ioe.toString());
}
}
private void createSocket()
{
System.out.println(TAG + " createsocket ");
try{
socket = new DatagramSocket(8550);
}catch (IOException ioe){
System.err.println(TAG + " createsocket " + ioe.toString());
}
shouldListen = true;
Executors.newSingleThreadExecutor().execute(new Runnable() {
@Override
public void run() {
byte[] inbuffer ;
String ip = "failed";
try{
ip = InetAddress.getLocalHost().getHostAddress();
}catch (UnknownHostException e){
System.err.println(TAG + " createsocket " + e.toString());
}
String port = String.valueOf(socket.getLocalPort());
System.out.println(TAG + " connect info " + ip + ":" + port);
while(shouldListen)
{
inbuffer = new byte[1500];
DatagramPacket packet = new DatagramPacket(inbuffer, inbuffer.length);
try {
System.out.println(TAG + " waiting on data");
socket.receive(packet); //blocking
byte[] data = new byte[packet.getLength()];
System.arraycopy(packet.getData(), packet.getOffset(),data,0,packet.getLength());
write(data);
} catch (IOException ioe) {
System.err.println(TAG + " createsocket " + ioe.toString());
}
}
}
});
}
private void write(byte[] incoming) throws IOException
{
System.out.println(TAG + " write " + String.valueOf(incoming.length) );
int count = 0;
for (byte b :
incoming) {
count++;
//writer.write("0x");
writer.write(String.format("%02X", b));
writer.write(" ");
if ((count % 16) == 0 ){
writer.newLine();
}
}
}
public void setShouldListen(boolean shouldListen) {
this.shouldListen = shouldListen;
}
}
Debugging
I used these methods to great advantage to check what was being written in different methods
public static void debugHex(String call, byte[] arr, int length)
{
StringBuilder sb = new StringBuilder();
int count = 0;
for (byte b :
arr) {
sb.append(String.format("%02X", b));
sb.append(" ");
count++;
if (length == count){
break;
}
}
System.out.println(TAG + call + sb.toString());
}
public static void deBugHexTrailing(String call, byte[] arr, int length)
{
StringBuilder sb = new StringBuilder();
int count = 0;
for (int i = arr.length-1; i >= (arr.length - length) && i >= 0; i--) {
sb.append(String.format("%02X", arr[i]));
sb.append(" ");
}
System.out.println(TAG + call + sb.toString());
}
I also used this to check on empty spaces in my nalus and caught a byte[] buffer that was padding data! Whoops!
public static void fillCompleteNalData(byte[] out, int entryPos, int exitPos)
{
int m = (exitPos - entryPos) /2;
StringBuilder sb = new StringBuilder();
sb
.append(" entry ").append(String.valueOf(entryPos))
.append(" exit ").append(String.valueOf(exitPos))
.append(" bstart ").append(String.format("%02X", out[entryPos]))
.append(" bmid ").append(String.format("%02X", out[entryPos + m]))
.append(" blast ").append(String.format("%02X", out[entryPos]));
System.err.println(sb.toString());
}
Comparing reassembled nalus
When I was done I also watched the debugger for my android and my pc to compare the length of the nalu I parsed at the encoder to the one I give to my receiving decoder. After using the above test code though they were an exact match.
There will be one more post after this talking about some extra classes and techniques I used to get this done. So if I gloss over something here make sure and check there to get your codes straight.
In order to decode the video we need a decoder that can understand what the nalu data has inside it. I’m using javafx with the javacv library to create the imagedecoder class. It paints an image onto an imageview with each frame it gets.
Here’s how I call it. Notice I tested it with a saved and emailed video from my android device first to make sure it was working.
The thing is, the imagedecoder class needs pristine annexb style nalus to work. I had all kinds of trouble getting it to play. Finally I downloaded ffmpeg to my windows machine and sent a stream of a video I had saved on my computer already to test the player. It worked. But I was even more clever, I also recorded the bytes sent in that stream so I could compare to what I was sending in myself. Muhahaha!!
Here’s the first section of what ffmpeg streamed. Notice anything? It send a nalu type 0x06 after the sps and pps. I also found out that it sent a nalu type 0x01 as well. I still am not sure what these are as I am writing this blog moments after completing my stream.
Here is the stream we will be sending. Notice is goes from sps pps straight to type 65 which is an idr slice. Also notice I had an error (bytes[1]&[2] are same) in my sps pps I was not aware of at the time. Very frustrating. After I fixed these errors this stream pattern plays!
00 00 00 01 67 80 80 1F E9 01 68 22 FD C0 36 85
09 A8 00 00 00 01 68 06 06 E2 00 00 00 01 65 B8
40 0B E4 2F F9 FF 12 00 02 1A
B8 48 F0 FF 36 5D 07 1E 52 C3 1F F3 FA A5 77 44
70 91 04 48 6A 59 C9 AE D3 B9 AA 18 C2 15 82 B4
30 92 2E C5 2D 26 C5 B0 A7 EE CD 9B 7E 99 D0 BE
8A 3E AF 69 18 DC 40 5D 40 3F 77 5C 98 49 C6 6D
4E ED 16 ED FB 7A 0A 04 AF D0 90 61 75 02 CE 3B
04 D3 69 A3 19 8E A6 AD 20 9B 69 A7 6C 88 AC 6E
5F F3 1A 2E 86 30 8D C0 15 74 C5 BC 5B 4E D7 F4
62 02 A8 B2 DA DA 08 31 80 48 F5 F7 5E 39 CC A6
5D E9 0B 62 DF B4 DE 1B 70 6E 8E 4D 40 B1 FC B6
68 C9 80 BA 82 1F F8 D7 68 E6 B3 6B 5B 4D 53 14
05 60 AB 9A 7D 5E D3 24 C3 41 75 16 4E 35 5F FE
DA 76 DB 1F 18 36 11 CD 74 8C 62 DD 0B A8 74 4F
00 82 F6 E9 27 A4 6D 8E 24 92 2F F2 F0 BA 83 58
04 B6 9A 4E D6 DD AC 71 78 15 34 97 CF 50 C6 32
3C 9B 8B 69 E9 A6 D9 B3 D7 13 22 A1 54 D7 A6 82
0A 64 08 07 4D 3D 34 FA 76 FE 85 D4 6C 8F F4 D3
In order to create this beautiful array of data we need our videodecoder class to sort through packets and serve up complete nalus in order. My example is still missing timing info an optimization so the picture is choppy and has artifacts. But this is getting you in the door. Which is a hell of lot better than where you started!
You have my code but the overall strategy is pretty basic.
incoming udp packets are written into my video decoder addpacket method
Packets are sorted by type all my packets were type 24(spspps) and type 28(nalu chunks)
packets are reworked and sent to the video decoder
Reworking sps pps
Thisvis easy simply split them up, add your 0x00 0x00 0x00 0x01 start code and send em through.
Reworking type 28 fua nalu chunks
To rebuild my nalus I kept a list
private Map<Integer, NaluBuffer> assemblyLine = new HashMap<>();
If a nalu has 100 pieces each piece shares the same timestamp. So I created a synchronized method to check if my list has already started building the nalu or if I need to start a new buffer. As below…
// Unpack either any split up nalu - This will get 99.999999 of nalus
synchronized private void unpackType28(byte[] twentyEight)
{
//Debug.deBugHexTrailing("unpack 28 ", twentyEight, 20 );
int ts = (twentyEight[4] << 24 | twentyEight[5] << 16 | twentyEight[6] << 8 | twentyEight[7] & 0XFF); //each nalu has a unique timestamp
//int seqN = (twentyEight[2] << 8 | twentyEight[3] & 0xFF); //each part of that nalu is numbered in order.
// numbers are from every packet ever. not this nalu. no zero or 1 start
//check if already building this nalu
if (assemblyLine.containsKey(ts)){
assemblyLine.get(ts).addPiece(twentyEight);
}
//add a new nalu
else
{
assemblyLine.put(ts, new NaluBuffer(ts, twentyEight));
}
}
As each piece is loaded into a buffer a few things happen. We record how long its been waiting (nalus that aren’t completed in under a second are worthless), we strip out the rtp headers etc, and we count sequence numbers to rebuild each piece one after another checking if the nalu is complete each time. Once complete its sent through to the video decoder.
My current code needs serious optimization. So you will notice major artifacts due to missing or late nalus and timing? forget about it. But its pretty simple to understand and you can build those features yourself.
I know, you deserve a nap but please hang in there.
The file I’m referencing is in the last post if you need it. Also MAJOR WARNING HERE!!! I did not test my rtp packet code against another software. There may be errors because I simply wrote what seemed to make sense and then wrote a javafx program to open it on the other side. But this still should get you pretty dang close.
In the previous post we had our sps, pps and different nalus being fed into a packetizer to be sent over the internet. As you are well aware in java we can use a TCP or UDP connection. Either is fine but I will focus on UDP for this post. Lets talk about that process.
RTP is a defined format that can send all kinds of data including video streams. A udp packet contains an rtp packet which contain a piece of data. We choose our packet size based on maximum transmission unit which is the number of bytes we can send at a time. In our example we set our mtu to 1500 and we limit our payload to 1300 so we have space for the enclosing packet headers as well.
Let look at the spspps packet. Its smaller and can be sent in a single rtp packet. All rtp packets must comply with the rfc guidelines. Search rfc 6184 to see what I’m talking about. It describes packetizing different data in different ways. Remember our buildspspps method? It needs to be organized according to these protocols. Below we build the payload that will be inserted into our rtp packet. This is done only once.
// get from myvideo / build sps and pps data
private void buildSPSPPS()
{
//without this stream is worthless
if (sps == null || pps == null){
notEOF = false;
Log.d(TAG, "buildSPSPPS: no sps or pps data");
return;
}
if (description == null){
description = new byte[sps.length + pps.length + pref.length ];
description[0] = 24;
//rtp header trpe 24 = Single-time aggregation packet 5.7.1
// Write NALU 1 size into the array (NALU 1 is the SPS).
description[1] = (byte) (sps.length >> 8);
description[2] = (byte) (sps.length & 0xFF);
// Write NALU 2 size into the array (NALU 2 is the PPS).
description[sps.length + 3] = (byte) (pps.length >> 8);
description[sps.length + 4] = (byte) (pps.length & 0xFF);
//write prefix
//System.arraycopy(pref, 0, description, description.length-6, pref.length);
// Write NALU 1 into the array, then write NALU 2 into the array.
System.arraycopy(sps, 0, description, 3, sps.length);
System.arraycopy(pps, 0, description, 5 + sps.length, pps.length);
Debug.debugFull(" build spspps ", description);
}
Then before every idr picture we send this data via an rtp packet.
Its important to note that we need to keep track of each packet sent so that or depacketizer can determine order and timing on the other side. That means we can have only a single buildRTPPacket() method and that it must be accessed from a single thread or synchronized. There are plenty of diagrams within the source code file but as you can see I build a header and combine the payload with the header. All rtp packets have the same info and are sent through this method.
public void buildRTPPacket(int payloadType, int timeStamp, byte[] payload, int payloadLength)
{
//Log.d(TAG, "buildRTPPacket: " + String.valueOf(payloadType));
//this is the actual packet being sent
byte[] rtpPacket = new byte[HEADER_SIZE + payloadLength];
sequenceNumber++; //keep our packet stream linear.splt nalus with same timestamp are ordered by this number
rtpHeader = new byte[HEADER_SIZE];
rtpHeader[0] = (byte) 0b10000000; //(byte) (VERSION << 6 | PADDING << 5 | EXTENSION << 4 | CSRC_COUNT);
rtpHeader[1] = (byte) payloadType; //ignore market bit //The first byte of a NAL unit co-serves as the RTP payload header -> https://tools.ietf.org/html/rfc6184 5.6
rtpHeader[2] = (byte) (sequenceNumber >> 8); //sequence move bits 8-16 right into the 8 bit buffer
rtpHeader[3] = (byte) (sequenceNumber & 0xff); //sequence only keep the the last 8 bits by masking
rtpHeader[4] = (byte) (timeStamp >> 24); //time stamp
rtpHeader[5] = (byte) (timeStamp >> 18); //time stamp
rtpHeader[6] = (byte) (timeStamp >> 8); //time stamp
rtpHeader[7] = (byte) (timeStamp & 0xFF); //time stamp
rtpHeader[8] = (byte) (SSRC >> 24); //ssrc
rtpHeader[9] = (byte) (SSRC >> 16); //ssrc
rtpHeader[10] = (byte) (SSRC >> 8); //ssrc
rtpHeader[11] = (byte) (SSRC & 0xff); //ssrc
// here we load the header into the first 12 bytes and the payload after that
System.arraycopy(rtpHeader, 0, rtpPacket,0,HEADER_SIZE);
System.arraycopy(payload,0,rtpPacket,HEADER_SIZE, rtpPacket.length-HEADER_SIZE);
debugPackets();
//send as soon as its built with true or false for console debugging
send(rtpPacket, false);
}
Packetizing the nalu is easier than unpacking it. Most nalus, but possibly not all, are much much bigger than our mtu so they need to be broken down. I’m using the FU-A format because the libstream library I was studying used it as well. It requires a two part header on top of each nalu piece. Each nalu piece shares the same timestamp as you can see but they each have an incremental sequence number provided by the rtp packet. Without the correct sequence number and timestamp your nalus cannot be reassembled. Below I loop until my entire nalu is sent.
//called by build nalu to send asap after building it will packetize nalu split it up or whatever
// single nalu (section 5.6) or fu-a see -> https://tools.ietf.org/html/rfc6184 section 5.4
private void packetizeNalu()
{
//Debug.checkNaluDataV2(naluBuffer);
//Log.d(TAG, "packetizeNalu: " + String.valueOf(naluBuffer.length));
//error checking
int nalLengthChecker = (naluBuffer[3]&0xFF | (naluBuffer[2]&0xFF)<<8 | (naluBuffer[1]&0xFF)<<16 | (naluBuffer[0]&0xFF)<<24); //original nal length
nalLengthChecker += 4; //here we add for the header 0-3... remember length includes nal header[4]type already
int writtenLength = 0;
int bytesAdded = 2; //here is our fua header
byte[] buffer;
//single nalu
if (naluLength+1 <= MAX_SIZE )
{
buffer = new byte[naluLength+1];
buffer[0] = naluHeader[4];
System.arraycopy(naluBuffer, 0, buffer, 1, naluLength);
buildRTPPacket(type, timeStamp, naluBuffer, naluLength);
}
// nalu is split like fu-a type
else{
/*
FU-indicator FU header
+---------------+ +---------------+ +---------------+
|0|1|2|3|4|5|6|7| |0|1|2|3|4|5|6|7|
+-+-+-+-+-+-+-+-+ +-+-+-+-+-+-+-+-+ FU Payload
|F|NRI| TypeofFU| |S|E|R| Type |
+---------------+ +---------------+ +---------------+
See rfc 6184 5.8 figure 15-ish
See rfc 6184 5.3 "the value of NRI to 11"
FU-A is type 28
*/
byte[] fuaHeader = new byte[2];
fuaHeader[0] = 0b01111100; //set indicator with "11" and type decimal 28 = FU-A -> 01111100
fuaHeader[1] = (byte) (naluHeader[4] & 0x1F); //set header 3-7
int tally = 0;
int tocopy;
boolean secondloop = false;
while(tally < naluLength)
{
tocopy = (naluLength - tally); //see whats left to write
if (tocopy >= MAX_SIZE-2) // we minus 2 to make space for both header bytes
{
tocopy = MAX_SIZE-2; //fit into max allowable packet size
buffer = new byte[MAX_SIZE];
}else{
buffer = new byte[tocopy+2]; //or shrink buffer to whats left plus header
}
if (secondloop) //turn ser to double zero on second loop
{
fuaHeader[1] = (byte) (fuaHeader[1]^(1 << 7));
secondloop = false;
//String s1 = String.format("%8s", Integer.toBinaryString(fuaHeader[1] & 0xFF)).replace(' ', '0');
//Log.d(TAG, "packetizeNalu: center header " + s1);
}
if (tally == 0) //first nalu in multi part. set SER...see above
{
fuaHeader[1] += 0x80;
secondloop = true;
//String s1 = String.format("%8s", Integer.toBinaryString(fuaHeader[1] & 0xFF)).replace(' ', '0');
//Log.d(TAG, "packetizeNalu: adjusted header " + s1);
}
System.arraycopy(naluBuffer, tally, buffer, 2, tocopy); //copy to buffer skipping first 2 bytes
tally += tocopy;
if (tally >= naluLength) //weve copied all the data, set ser to last on multipart
{
fuaHeader[1] += 0x40;
//String s1 = String.format("%8s", Integer.toBinaryString(fuaHeader[1] & 0xFF)).replace(' ', '0');
//Log.d(TAG, "packetizeNalu: re-adjut header " + s1);
}
buffer[0] = fuaHeader[0];
buffer[1] = fuaHeader[1];
buildRTPPacket(fuaHeader[0], timeStamp, buffer, buffer.length);
writtenLength += (buffer.length - bytesAdded); //here we count how many bytes were sent to packetizer to compare to our starting amount
}
if (writtenLength != nalLengthChecker){
Log.e(TAG, "packetizeNalu: Mismatched Size orig: " + String.valueOf(nalLengthChecker) + " written " + String.valueOf(writtenLength), null );
}
}
//Debug.checkNaluData(naluBuffer);
}
Then we send them to there destination. That’s it! Your data is on its way!!!
In our android app we have saved the file and now we are passing it to our sdp maker. Ironically I do not actually use session description protocol. I just didn’t know it was not needed so I named this class incorrectly.
Our sdpmaker class uses a randomaccessfile to parse through the data by reading each byte and looking for box headers. Here is the start of the method where you can get the idea of how the whole class works.
public static byte[][] retreiveSPSPPS(File file) throws IOException, FileNotFoundException
{
byte[] sps = new byte[0]; //we will find the bytes and read into these arrays then convert to the string values
byte[] pps = new byte[0];
byte[] prfix = new byte[6];
byte[][] spspps;
String[] spsppsString = new String[2];
RandomAccessFile randomAccessFile; //file type to allow searching file byte by byte
long fileLength = 0;
long position = 0;
long moovPos = 0;
byte[] holder = new byte[8];
//get the file we saved our little video too
randomAccessFile = new RandomAccessFile(file, "r");
fileLength = randomAccessFile.length();
// here we find the moov box within the mp4 file
while(position < fileLength) {
//read our current position and then advance to next position
randomAccessFile.read(holder, 0, 8);
position += 8;
if (checkForBox(holder)) {
String name = new String(holder, 4, 4);
if (name.equals("moov")) {
moovPos = position;
Log.d(TAG, "retreiveSPSPPS: found moov box = " + name);
break;
}
}
}
Check out this picture again. Notice how the boxes are nested? My code above isn’t optimized for any use case. But as you can see I start by finding the moov box and then search my way through each nested box to find the data i need.
Here you can see where I am extracting my sps. Read through the full code for all the details.
if (read[0] == 'g') {
//ascii 'g' = hex 67 <- we found the sps
int length = bLength & 0xff; //blength is the length of the sps
remaining = new byte[length];
randomAccessFile.read(remaining, 0, length-1); //minus 1 because we already read the g
//scoot everything down and add our g at the begining
for (int i = length-1; i > 0 ; i--) {
remaining[i] = remaining[i-1];
}
remaining[0] = read[0];
sps = remaining;
String s = bytesToHex(remaining);
Log.d(TAG, "retreiveSPSPPS: found sps: " + s + " length used: " + String.valueOf(length));
Once this is done we need to save this data in our app. As long as we don’t change the media recorder settings when we stream this sps and pps data will allow a decoder to decode it correctly.
On a side note I also saved a prefix byte[] but this turned out to be unnecessary. Stick with the sps and pps.
As I said, the mp4 file is streamed and then data to decode the file is written after. So like most file types mp4 is constructed in parts. Frequently you hear the term file header which is a section that explain the files contents. With mp4 its full of boxes. These boxes might be at the beginning or they might be at the end. We don’t know and we have to find out. Below is a software that allows you to open up the contents of an mp4 file.
Some key parts…
fytp -> decsribes basic contents
mdat -> the actual video data
avCC -> the stuff we need to decode the data
Parsing a video file
We are examining the h264 codec. h264 is a software that takes images and encodes them to reduce file size. These images are then wrapped up in the above boxes and into an mp4 container.
Lets think about this, you camera takes a 2mb picture. A video plays 30 frames per second or 30fps. A cd can hold 700mb. So if a video was simply a series of pictures a DVD would only contain 60mb per second or 12 seconds of video total.
Instead the h264 codec compresses a single image then records a series of “changes” that happen to the image. So 30 frames of a single second of video might be one actual complete image and 29 “changes” to that image. This is the pattern below repeated numerous times as video plays.
Of course there is a lot more to know but each of the above is called a slice. These slices are saved in that mdat box one after another. A slice is not the same as a frame but sometimes it can be.
NALU or network abstraction layer unit is what these slices are saved as. These nalus are saved on after another and are separated by headers. There are two main types of headers we will be dealing with. Below the are written in HEX
AnnexB -> 0x00 0x00 0x00 0x01 0x65 The last tells you what type. The first four is just a startcode with no data
These headers are simply a string of zeros and a one plus the nalu type. The video codec makes sure there are no other instances where this format can be found in the data output.
Avcc -> 0x00 0x02 0x4A 0x8F 0x65 The first four are the length the last described what type it is.Obviously the first four change with each data it represents.
If you make the accidental mistake of padding some data by copying a half filled buffer you will destroy your data’s readability by any decoder because you emulate the annex-b style start code. This goes for either type. Working with this data is unforgiving. (Sound like the voice of experience here!)
Here are the different types.
0 Unspecified non-VCL
1 Coded slice of a non-IDR picture VCL
2 Coded slice data partition A VCL
3 Coded slice data partition B VCL
4 Coded slice data partition C VCL
5 Coded slice of an IDR picture VCL
6 Supplemental enhancement information (SEI) non-VCL
7 Sequence parameter set non-VCL
8 Picture parameter set non-VCL
9 Access unit delimiter non-VCL
10 End of sequence non-VCL
11 End of stream non-VCL
12 Filler data non-VCL
13 Sequence parameter set extension non-VCL
14 Prefix NAL unit non-VCL
15 Subset sequence parameter set non-VCL
16 Depth parameter set non-VCL
17..18 Reserved non-VCL
19 Coded slice of an auxiliary coded picture without partitioning non-VCL
20 Coded slice extension non-VCL
21 Coded slice extension for depth view components non-VCL
22..23 Reserved non-VCL
24..31 Unspecified non-VCL
Based on this information expect to see files like this.
[size or start code][type][data payload] repeated x infinity…might as well be
Parsing SPS & PPS
Data in each box can also be found if you know where to look. Check out our avcc box here. I have it labeled for you and you can see it in hex and ascii.
Here you can find the data necessary to parse you video file. According to this chart… source is stackoverflow
bits
8 version ( always 0x01 )
8 avc profile ( sps[0][1] )
8 avc compatibility ( sps[0][2] )
8 avc level ( sps[0][3] )
6 reserved ( all bits on )
2 NALULengthSizeMinusOne
3 reserved ( all bits on )
5 number of SPS NALUs (usually 1)
repeated once per SPS:
16 SPS size
variable SPS NALU data
8 number of PPS NALUs (usually 1)
repeated once per PPS
16 PPS size
variable PPS NALU data
Remember the avcc 4 header bytes that gave you the length? Those are described in NAlulengthsizeminusone. They could also be two bytes for example. Its minus one because you can only count to three with the two bits of space allowed so 11 = 4 and 01 = 2….a bit quirky.
Now we have an understanding of the basic makeup of a mp4 file lets parse it in next section. Where we go deeper.
I’m not sure how you got here, but if you need to stream or dissect video this might be your lucky day. Whenever I write a new article my biggest joy is choosing an image to represent the experience a user should expect when tackling this project. I couldn’t make up my mind and both are appropriate.
Over the last several weeks I have been falling down the rabbit hole of streaming from an android device to another computer. Despite the ubiquity of streaming apps right now there is not a lot of easy solutions on how to stream from android and I found more unanswered questions than answers.
In this post I will tell you step by step how I streamed from android to a pc. But be warned this is for average to ninja developers. If its your first android, desktop of web app you might not make it through this explanation.
Secondly, I am no expert in video or streaming services. I’m posting this article as fresh as I can from learning in order to maintain my beginner point of view. This article is a great stepping stone for someone like me trying to understand the basics. The code works on my device. Its not production code, video artifacts remain and I have a lot of optimization and polishing that will be done. But I think its much easier to understand my rough code with all its notes etc that to see a bunch of polished methods
There are several ways to come at streaming lets consider them all and I tell you why i did what i did.
— Using Someone Else’s Frame Work —
The first is relying on an outside streaming service. There are several services that will gladly provide a simple api and charge you to stream data from the phone to a server somewhere.
The second is a free library that will give you a framework. Webrtc is an example that can allow you to video chat and provides an api for establishing communications. The second is libstream which was one of my greatest learning tools in this project.
Third are headless api’s such as ffmpeg and gstreamer. Ffmpeg is a little tough to get started with but it provided some great data for me to examine.
If you need to video chat or stream entertainment content these are great solutions.
–Doing The dirty Work Yourself —
There are two pitfalls with the above methods. Either in the form of money or constraints based on the api. I wanted to really understand how the video data was being routed. I wanted to route everything myself and control almost every detail.
My intention was to eventually use this android video and audio data for AI processing at a remote location. I didn’t want to let someone else’s API decide the bandwidth usage or whether FPS or image compression would be used to compensate for such issues of reduced connection. I also wanted to control how when connection are established. Truthfully I had no idea how the above things would be handled in an api. But I didn’t want to find out after I committed and decided I needed to learn a bit so the journey was worth it for me.
Inside android there are two methods for getting video data. MediaRecorder and MediaCodec. I chose MediaRecorder out of simplicity although I suspect MediaCodec has further advantages. If you follow this guide I suspect you can switch later when you are a bit smarter and have had some time to breath.
In this example I’m using android studio and sending the data to a javafx app on windows desktop
Below is the basic outline of the steps:
This is the very very broad strokes.
Camera2 ->Basic video class or recording with camera2 and a few tweaks
Data pipe -> This gets your data out of the camera2 class
Packetizer -> Bundle that data and send it somewhere
Depacketizer -> Get that video back out andinto a decoder
Why is it so hard?
Looking at the three steps above you may wonder, if you have already been trying a bit, why is it so tough? Think about it. The first successful streaming service was skype in 2003. Google duo only came out in 2016 and apple video chat a few years earlier. Even more remarkable is that these video services share many of the similar software libraries and video streaming in any quality relies on the heavily patented h264 codec. So don’t stress out too much. Its tough and there’s a lot to know.
This is a multi part post so please keep moving forward.
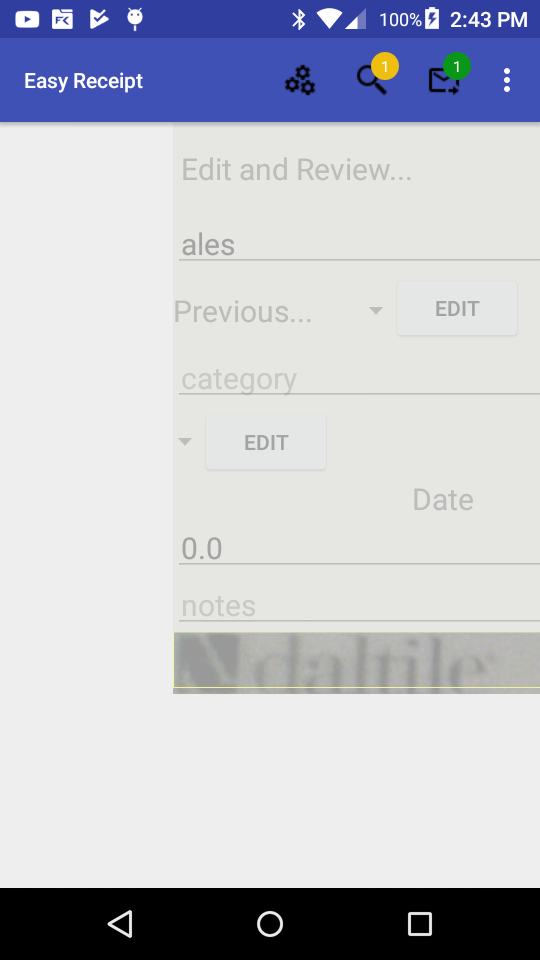
I needed to allow my easy receipt app to do a few simple things.
-A way for the user to review the receipts that was swipe-able.
-This view needed to show data and an image
-It needed left right detection as well
The basic components for this are as follows;
Layouts-
I used two main layout files plus others. A linear layout to hold our swipe-able layouts, a coordinator layout which is required to detect the swipe dismiss behavior and get swiped away, plus other various layouts that go inside the coordinator layout.
Here is my coordinator layout. Notice I used frame layout on the top for my textviews and buttons and a zoomable image view on the bottom which is not a standard android class.
In order to get the swipe direction I had to create a custom swipe dismiss behavior class to get the callback direction.
In my fragment I used this code to set up the custom swipe dismiss behavior onto my coordinator layout.
private void setUPUI()
{
Log.d(TAG, "setUPUI: ");
final CustomSwipDismissBehavior mSwipe = new CustomSwipDismissBehavior();
mSwipe.setSwipeDirection(SwipeDismissBehavior.SWIPE_DIRECTION_ANY);
mSwipe.setSensitivity(.1f);
mSwipe.setDragDismissDistance(.9f);
swiper = mSwipe;
mSwipe.setListener(new SwipeDismissBehavior.OnDismissListener() {
@Override
public void onDismiss(View view) {
int i = mSwipe.getDirection();
Log.d(TAG, "onDismiss: ---------------- " + String.valueOf(i));
if (i == 2){
//left swipe
}else {
//right swipe
}
}
@Override
public void onDragStateChanged(int state) {
}
});
But in order to get the direction which I could not find a way to do with androids standard setup I had to make a custom swipe dismiss behavior like so.
public class CustomSwipDismissBehavior extends SwipeDismissBehavior{
private final String TAG = "CustomSwipeBehavior";
public final static int IDLE = 0;
public final static int LEFT = 1;
public final static int RIGHT = 2;
float x1, x2;
float minimum = 0;
//1 left, 2 = right
int direction = 1;
boolean acceptswipe = true;
@Override
public void setListener(OnDismissListener listener) {
super.setListener(listener);
}
@Override
public boolean onInterceptTouchEvent(CoordinatorLayout parent, View child, MotionEvent event) {
//Log.d(TAG, "onInterceptTouchEvent: " + event);
setDirection(event);
return super.onInterceptTouchEvent(parent, child, event);
}
@Override
public boolean onTouchEvent(CoordinatorLayout parent, View child, MotionEvent event) {
setDirection(event);
return super.onTouchEvent(parent, child, event);
}
@Override
public boolean canSwipeDismissView(@NonNull View view) {
if (acceptswipe) {
Log.d(TAG, "onTouchEvent: 1");
return super.canSwipeDismissView(view);
}else {
Log.d(TAG, "onTouchEvent: 2");
return false;
}
}
@Override
public void setSensitivity(float sensitivity) {
super.setSensitivity(sensitivity);
if (sensitivity == 0.0f){
acceptswipe = false;
}else{
acceptswipe = true;
}
}
private void setDirection(MotionEvent event)
{
//Log.d(TAG, "setDirection: motion event = " + event);
switch (event.getAction()){
case MotionEvent.ACTION_DOWN:
if (x1 == 0) {
x1 = event.getX();
//Log.d(TAG, "calculate: x1: " + String.valueOf(x1));
}
break;
case MotionEvent.ACTION_MOVE:
if (x1 == 0) {
x1 = event.getX();
//Log.d(TAG, "calculate: x1: " + String.valueOf(x1));
}
break;
case MotionEvent.ACTION_UP:
x2 = event.getX();
//Log.d(TAG, "calculate: x2 : " + String.valueOf(x2));
calculate(x1, x2);
break;
}
}
private void calculate(float x1, float x2)
{
float delta = x1 - x2;
//Log.d(TAG, "calculate: x1: " + String.valueOf(x1) + " x2: " + String.valueOf(x2) + " delta: " + String.valueOf(delta));
if (delta > minimum){
direction = LEFT;
}
else if (delta < -minimum){
direction = RIGHT;
}
else{
direction = IDLE;
}
x1 = 0;
x2 = 0;
//Log.d(TAG, "calculate: " + direction);
}
public int getDirection()
{
int temp = direction;
direction = IDLE;
return temp;
}
}
If you are building an app with the android camera2 api here are my thoughts after fighting with it. (Full code at bottom for copy paste junkies)
This api was a little verbose with me using about 1200 lines of code. It could probably be done easier but if you want something custom here is what you might end up with. I used the github example to copy this code with full blown example here.
Here is my code all folded up with some clear descriptions of what everything does. If you the my code below which is essentially just the basic camera example twisted and reorganized so it makes sense to me. Notice this is all contained in a fragment.
android camera2 api
There are three things someone using my version, or the original github version would need to change. If you are tackling this project don’t hesitate to copy the code on this page and focus on the changes you need instead of trying to wrap you head around the whole project.
The first is the button setup. Im not really interested into diving into this. Check my codes “camera still picture chain” and you can see how the events are initiated.
The second is the save method(see “Inner classes” in my code folds) . The example gives you a runnable image saver which will probably need to be reworked according to your file storage system or if you need to handle the image for further processing. Working with large image files its best to save the file and pass a URI and take smaller samples of the image to reduce heap size.
Third why does samsung spin the dang images. This took me a while to figure out and I was super upset about it. Here is the code my “Image Review” fragment used to flip and save the image the right way. I believe this was sourced from several sources and have no idea who to give credit too.
private void rotateImage(int degree)
{
Log.d(TAG, "rotateImage: ");
Matrix mat = new Matrix();
mat.postRotate(degree);
bitmapToReview = Bitmap.createBitmap(bitmapToReview, 0,0,bitmapToReview.getWidth(), bitmapToReview.getHeight(), mat, true);
}
private void createPreviewImage()
{
//get exif data and make bitmap
int orientation = 0;
try {
ExifInterface exifInterface = new ExifInterface(uriOfImage.getPath());
bitmapToReview = MediaStore.Images.Media.getBitmap(getActivity().getContentResolver(), uriOfImage);
orientation = exifInterface.getAttributeInt(ExifInterface.TAG_ORIENTATION, ExifInterface.ORIENTATION_NORMAL);
}catch (Exception e){
Log.e(TAG, "createPreviewImage: ", e);
Crashlytics.log(TAG + " " + e);
Toast.makeText(getActivity(), "Error loading image", Toast.LENGTH_SHORT).show();
}
//check rotation and rotate if needed
switch (orientation){
case ExifInterface.ORIENTATION_ROTATE_90:
Log.d(TAG, "createPreviewImage: 90");
rotateImage(90);
break;
case ExifInterface.ORIENTATION_ROTATE_180:
Log.d(TAG, "createPreviewImage: 180");
rotateImage(180);
break;
case ExifInterface.ORIENTATION_ROTATE_270:
Log.d(TAG, "createPreviewImage: 270");
rotateImage(270);
break;
}
//display on screen
imageView_Preview.setImageBitmap(bitmapToReview);
}
So that’s it. This post was basically to complain that I spent a week retyping this entire thing out to prove that I could tame it. In reality i licked my wounds and moved on with my life because sometimes there are more important things to do than fight the system.
For the full code see below and try not too be frightened.
import android.Manifest;
import android.app.Activity;
import android.app.AlertDialog;
import android.app.Dialog;
import android.app.DialogFragment;
import android.app.Fragment;
import android.content.Context;
import android.content.DialogInterface;
import android.content.pm.PackageManager;
import android.content.res.Configuration;
import android.graphics.ImageFormat;
import android.graphics.Matrix;
import android.graphics.Point;
import android.graphics.RectF;
import android.graphics.SurfaceTexture;
import android.hardware.camera2.CameraAccessException;
import android.hardware.camera2.CameraCaptureSession;
import android.hardware.camera2.CameraCharacteristics;
import android.hardware.camera2.CameraDevice;
import android.hardware.camera2.CameraManager;
import android.hardware.camera2.CameraMetadata;
import android.hardware.camera2.CaptureRequest;
import android.hardware.camera2.CaptureResult;
import android.hardware.camera2.TotalCaptureResult;
import android.hardware.camera2.params.StreamConfigurationMap;
import android.media.Image;
import android.media.ImageReader;
import android.net.Uri;
import android.os.Bundle;
import android.os.Handler;
import android.os.HandlerThread;
import android.support.annotation.NonNull;
import android.support.annotation.Nullable;
import android.support.design.widget.FloatingActionButton;
import android.support.design.widget.Snackbar;
import android.support.v4.app.ActivityCompat;
import android.support.v4.content.ContextCompat;
import android.util.Log;
import android.util.SparseIntArray;
import android.view.LayoutInflater;
import android.view.Surface;
import android.view.TextureView;
import android.view.View;
import android.view.ViewGroup;
import android.widget.Toast;
import com.crashlytics.android.Crashlytics;
import com.signal.cagney.easyreceipt.AutoFitTextureView;
import com.signal.cagney.easyreceipt.EasyReceipt;
import com.signal.cagney.easyreceipt.MainActivity;
import com.signal.cagney.easyreceipt.R;
import com.signal.cagney.easyreceipt.Util.FileManager;
import com.squareup.leakcanary.RefWatcher;
import java.io.File;
import java.io.FileOutputStream;
import java.nio.ByteBuffer;
import java.util.ArrayList;
import java.util.Arrays;
import java.util.Collections;
import java.util.Comparator;
import java.util.List;
import java.util.concurrent.Semaphore;
import java.util.concurrent.TimeUnit;
public class Main_Fragment extends Fragment implements ActivityCompat.OnRequestPermissionsResultCallback{
private static final String TAG = "MAIN_FRAGMENT";
View myFragmentView;
private AutoFitTextureView mTextureView;
boolean currentlyCapturing;
public final static int GALLERY_CHOOSE = 12;
FileManager fileManager;
//region------------------------camera states
private static final int STATE_PREVIEW = 0;
/**
* Camera state: Waiting for the focus to be locked.
*/
private static final int STATE_WAITING_LOCK = 1;
/**
* Camera state: Waiting for the exposure to be precapture state.
*/
private static final int STATE_WAITING_PRECAPTURE = 2;
/**
* Camera state: Waiting for the exposure state to be something other than precapture.
*/
private static final int STATE_WAITING_NON_PRECAPTURE = 3;
/**
* Camera state: Picture was taken.
*/
private static final int STATE_PICTURE_TAKEN = 4;
/**
* Max preview width that is guaranteed by Camera2 API
*/
private static final int MAX_PREVIEW_WIDTH = 1920;
/**
* Max preview height that is guaranteed by Camera2 API
*/
private static final int MAX_PREVIEW_HEIGHT = 1080;
//endregion
//region------------------------------------------------------- camera fields
private CameraDevice mCameraDevice;
private CaptureRequest.Builder previewBuilder;
private CaptureRequest mPreviewRequest;
private CameraCaptureSession mCameraCaptureSession;
private static final SparseIntArray ORIENTATIONS = new SparseIntArray();
private static final int REQUEST_CAMERA_PERMISSIONS = 1;
private static final String FRAGMENT_DIALOG = "dialog";
private ImageReader imageReader;
private int mSensorOrientation;
private Handler mBackgroundHandler;
private int mState = STATE_PREVIEW;
private Semaphore mCameraOpenCloseLock = new Semaphore(1);
private String mCameraId;
private HandlerThread mBackgroundThread;
private boolean mFlashSupported;
private android.util.Size mPreviewSize;
static {
ORIENTATIONS.append(Surface.ROTATION_0, 90);
ORIENTATIONS.append(Surface.ROTATION_90, 0);
ORIENTATIONS.append(Surface.ROTATION_180, 270);
ORIENTATIONS.append(Surface.ROTATION_270, 180);
}
private final CameraDevice.StateCallback mStateCallback = new CameraDevice.StateCallback() {
@Override
public void onOpened(@NonNull CameraDevice cameraDevice) {
Log.d(TAG, "onOpened: ");
mCameraOpenCloseLock.release();
mCameraDevice = cameraDevice;
creatCameraPreviewSession();
}
@Override
public void onDisconnected(@NonNull CameraDevice cameraDevice) {
Log.d(TAG, "onDisconnected: ");
mCameraOpenCloseLock.release();
cameraDevice.close();
mCameraDevice =null;
}
@Override
public void onError(@NonNull CameraDevice cameraDevice, int i) {
Log.d(TAG, "onError: ");
mCameraOpenCloseLock.release();
cameraDevice.close();
mCameraDevice = null;
Activity activity = getActivity();
if (null != activity){
activity.finish();
}
}
};
private final ImageReader.OnImageAvailableListener mOnImageAvailableListener
= new ImageReader.OnImageAvailableListener() {
@Override
public void onImageAvailable(ImageReader imageReader) {
Log.d(TAG, "onImageAvailable: ");
Image image = imageReader.acquireNextImage();
mBackgroundHandler.post(new ImageSaver(image, fileManager ));
}
};
private CameraCaptureSession.CaptureCallback mCaptureCallback = new CameraCaptureSession.CaptureCallback() {
private void process(CaptureResult result)
{
switch (mState){
case STATE_PREVIEW: {
//working normal. do nothing
//Log.d(TAG, "process: " + result.toString());
break;
}
case STATE_WAITING_LOCK: {
Integer afState = result.get(CaptureResult.CONTROL_AF_STATE);
Log.d(TAG, "process: state awaiting afstate = " + String.valueOf(afState) + " Captureresult = " + result.toString());
if (afState == null || afState == CaptureResult.CONTROL_MODE_OFF ) {
Log.d(TAG, "process: null");
captureStillPicture();
} else if (CaptureResult.CONTROL_AF_STATE_FOCUSED_LOCKED == afState ||
CaptureResult.CONTROL_AF_STATE_NOT_FOCUSED_LOCKED == afState) {
Log.d(TAG, "process: something else");
Integer aeState = result.get(CaptureResult.CONTROL_AE_STATE);
if (aeState == null ||
aeState == CaptureResult.CONTROL_AE_STATE_CONVERGED) {
Log.d(TAG, "process: something even more");
mState = STATE_PICTURE_TAKEN;
captureStillPicture();
} else {
runPreCaptureSequence();
}
}
break;
}
case STATE_WAITING_PRECAPTURE: {
Integer aeState = result.get(CaptureResult.CONTROL_AE_STATE);
Log.d(TAG, "process: precapture " + String.valueOf(aeState) + " Captureresult = " + result.toString());
if (aeState == null ||
aeState == CaptureResult.CONTROL_AE_STATE_PRECAPTURE ||
aeState == CaptureRequest.CONTROL_AE_STATE_FLASH_REQUIRED) {
mState = STATE_WAITING_NON_PRECAPTURE;
}
break;
}
case STATE_WAITING_NON_PRECAPTURE: {
Integer aeState = result.get(CaptureResult.CONTROL_AE_STATE);
Log.d(TAG, "process: non-precapture" + String.valueOf(aeState) + " Captureresult = " + result.toString());
if (aeState == null || aeState != CaptureResult.CONTROL_AE_STATE_PRECAPTURE){
mState =STATE_PICTURE_TAKEN;
captureStillPicture();
}
break;
}
}
}
@Override
public void onCaptureProgressed(@NonNull CameraCaptureSession session, @NonNull CaptureRequest request, @NonNull CaptureResult partialResult) {
//Log.d(TAG, "onCaptureProgressed: ");
process(partialResult);
}
@Override
public void onCaptureCompleted(@NonNull CameraCaptureSession session, @NonNull CaptureRequest request, @NonNull TotalCaptureResult result) {
//Log.d(TAG, "onCaptureCompleted: callback");
process(result);
}
};
private final TextureView.SurfaceTextureListener mSurfaceTextureListener
= new TextureView.SurfaceTextureListener() {
@Override
public void onSurfaceTextureAvailable(SurfaceTexture surfaceTexture, int i, int i1) {
Log.d(TAG, "onSurfaceTextureAvailable: ");
openCamera(i, i1);
}
@Override
public void onSurfaceTextureSizeChanged(SurfaceTexture surfaceTexture, int i, int i1) {
Log.d(TAG, "onSurfaceTextureSizeChanged: ");
configureTransform(i, i1);
}
@Override
public boolean onSurfaceTextureDestroyed(SurfaceTexture surfaceTexture) {
Log.d(TAG, "onSurfaceTextureDestroyed: ");
return false;
}
@Override
public void onSurfaceTextureUpdated(SurfaceTexture surfaceTexture) {
//Log.d(TAG, "onSurfaceTextureUpdated: ");
}
};
//endregion
//region------------------------------------------------------------------- Fragment Setup
@Override
public View onCreateView(LayoutInflater inflater, ViewGroup container, Bundle savedInstanceState) {
myFragmentView = inflater.inflate(R.layout.main_frag_layout, container,false);
setupUI();
return myFragmentView;
}
@Override
public void onViewCreated(View view, @Nullable Bundle savedInstanceState) {
super.onViewCreated(view, savedInstanceState);
}
@Override
public void onActivityCreated(@Nullable Bundle savedInstanceState) {
super.onActivityCreated(savedInstanceState);
fileManager = ((MainActivity)getActivity()).getFileManager();
//mFile = newPictureFileName();
}
private void setupUI()
{
mTextureView = (AutoFitTextureView) myFragmentView.findViewById(R.id.texture);
FloatingActionButton fabGall = (FloatingActionButton) myFragmentView.findViewById(R.id.fabGallery);
fabGall.setImageResource(R.drawable.folder);
fabGall.setOnClickListener(new View.OnClickListener() {
@Override
public void onClick(View view) {
if (notToBusyToComply()){
((MainActivity)getActivity()).openGallery();
}
/*
Snackbar.make(view, "Replace with your own action", Snackbar.LENGTH_LONG)
.setAction("Action", null).show();
*/
}
});
FloatingActionButton fabPic = (FloatingActionButton) myFragmentView.findViewById(R.id.fabTakePicture);
fabPic.setImageResource(R.drawable.camera);
fabPic.setOnClickListener(new View.OnClickListener() {
@Override
public void onClick(View view) {
if (notToBusyToComply()){
takePicture();
}
}
});
}
//endregion
//region------------------------------------------------------------------- Camera Main Methods
private void openCamera(int width, int height)
{
Log.d(TAG, "openCamera: ");
if (ContextCompat.checkSelfPermission(getActivity(), android.Manifest.permission.CAMERA)
!= PackageManager.PERMISSION_GRANTED){
requestCameraPermission();
return;
}
Log.d(TAG, "openCamera: setup");
setUpCameraOutputs(width, height);
Log.d(TAG, "openCamera: configure");
configureTransform(width, height);
Activity activity = getActivity();
CameraManager manager = (CameraManager) activity.getSystemService(Context.CAMERA_SERVICE);
try{
if ( !mCameraOpenCloseLock.tryAcquire(2500, TimeUnit.MILLISECONDS)){
throw new RuntimeException("Time out waiting to lock camera opening");
}
manager.openCamera(mCameraId, mStateCallback, mBackgroundHandler);
}catch (CameraAccessException e){
e.printStackTrace();
}catch (InterruptedException e){
throw new RuntimeException("Interupted while trying to lock camera opening", e);
}
}
private void closeCamera()
{
Log.d(TAG, "closeCamera: ");
try {
mCameraOpenCloseLock.acquire();
if (null != mCameraCaptureSession) {
mCameraCaptureSession.close();
mCameraCaptureSession = null;
}
if (null != mCameraDevice) {
mCameraDevice.close();
mCameraDevice = null;
}
if (null != imageReader) {
imageReader.close();
imageReader = null;
}
} catch (InterruptedException e) {
throw new RuntimeException("Interrupted while trying to lock camera closing.", e);
} finally {
mCameraOpenCloseLock.release();
}
}
private void creatCameraPreviewSession()
{
Log.d(TAG, "creatCameraPreviewSession: ");
try {
SurfaceTexture texture = mTextureView.getSurfaceTexture();
assert texture != null;
texture.setDefaultBufferSize(mPreviewSize.getWidth(), mPreviewSize.getHeight());
Surface surface = new Surface(texture);
previewBuilder = mCameraDevice.createCaptureRequest(CameraDevice.TEMPLATE_PREVIEW);
previewBuilder.addTarget(surface);
mCameraDevice.createCaptureSession(Arrays.asList(surface, imageReader.getSurface()),
new CameraCaptureSession.StateCallback() {
@Override
public void onConfigured(@NonNull CameraCaptureSession cameraCaptureSession) {
Log.d(TAG, "onConfigured: ");
if (null == mCameraDevice){
return;
}
mCameraCaptureSession = cameraCaptureSession;
try{
previewBuilder.set(CaptureRequest.CONTROL_AF_MODE,
CaptureRequest.CONTROL_AF_MODE_CONTINUOUS_PICTURE);
mPreviewRequest = previewBuilder.build();
mCameraCaptureSession.setRepeatingRequest(mPreviewRequest,
mCaptureCallback, mBackgroundHandler);
}catch (CameraAccessException e){
Log.e(TAG, "onConfigured: ", e);
Crashlytics.log(TAG + " " + e);
}
}
@Override
public void onConfigureFailed(@NonNull CameraCaptureSession cameraCaptureSession) {
showToast("Failed Preview");
}
}, null);
}catch (CameraAccessException e){
Log.e(TAG, "creatCameraPreviewSession: ", e);
Crashlytics.log(TAG + " " + e);
}
}
private void takePicture()
{
Log.d(TAG, "takePicture: capture chain 1");
//mFile = newPictureFileName();
lockFocus();
}
//endregion
//region------------------------------------------------------------------- Camera Still Picture Chain
private void lockFocus()
{
Log.d(TAG, "lockFocus: capture chain 2");
try{
previewBuilder.set(CaptureRequest.CONTROL_AF_TRIGGER,
CameraMetadata.CONTROL_AF_TRIGGER_START);
mState = STATE_WAITING_LOCK;
mCameraCaptureSession.capture(previewBuilder.build(), mCaptureCallback,
mBackgroundHandler);
} catch (CameraAccessException e){
Log.e(TAG, "lockFocus: ", e);
Crashlytics.log(TAG + " " + e);
}
}
private void runPreCaptureSequence()
{
Log.d(TAG, "runPreCaptureSequence: capture chain 3");
try{
previewBuilder.set(CaptureRequest.CONTROL_AE_PRECAPTURE_TRIGGER,
CaptureRequest.CONTROL_AE_PRECAPTURE_TRIGGER_START);
mState = STATE_WAITING_PRECAPTURE;
mCameraCaptureSession.capture(previewBuilder.build(), mCaptureCallback,
mBackgroundHandler);
}catch (CameraAccessException e){
Log.e(TAG, "runPreCaptureSequence: ", e);
Crashlytics.log(TAG + " " + e);
}
}
private void captureStillPicture()
{
if (currentlyCapturing){
Log.d(TAG, "captureStillPicture: returning");
return;
}
Log.d(TAG, "captureStillPicture: capture chain 4");
//currentlyCapturing = true;
try{
final Activity activity = getActivity();
if (null == activity || null == mCameraDevice){
Log.d(TAG, "captureStillPicture: null checks");
return;
}
final CaptureRequest.Builder captureBuilder =
mCameraDevice.createCaptureRequest(CameraDevice.TEMPLATE_STILL_CAPTURE);
captureBuilder.addTarget(imageReader.getSurface());
captureBuilder.set(CaptureRequest.CONTROL_AF_MODE, CaptureRequest.CONTROL_AF_MODE_CONTINUOUS_PICTURE);
int rotation = activity.getWindowManager().getDefaultDisplay().getRotation();
captureBuilder.set(CaptureRequest.JPEG_ORIENTATION, getOrientation(rotation));
CameraCaptureSession.CaptureCallback captureCallback = new CameraCaptureSession.CaptureCallback() {
@Override
public void onCaptureCompleted(@NonNull CameraCaptureSession session,
@NonNull CaptureRequest request,
@NonNull TotalCaptureResult result) {
super.onCaptureCompleted(session, request, result);
Log.d(TAG, "onCaptureCompleted: from chain 4");
unlockFocus();
//currentlyCapturing = false;
}
};
mCameraCaptureSession.stopRepeating();
mCameraCaptureSession.abortCaptures();
mCameraCaptureSession.capture(captureBuilder.build(), captureCallback, null);
}catch (CameraAccessException cae){
Log.e(TAG, "captureStillPicture: ", cae);
Crashlytics.log(TAG + " " + cae);
}
}
//endregion
//region------------------------------------------------------------------- Camera Supporting Methods
private int getOrientation(int rotation)
{
int returnValue = (ORIENTATIONS.get(rotation) + mSensorOrientation + 270) % 360;
Log.d(TAG, "getOrientation: in " + String.valueOf(rotation) + " out " + String.valueOf(returnValue));
return returnValue;
}
private void unlockFocus()
{
try {
previewBuilder.set(CaptureRequest.CONTROL_AF_TRIGGER,
CameraMetadata.CONTROL_AF_TRIGGER_CANCEL);
mCameraCaptureSession.capture(previewBuilder.build(), mCaptureCallback,
mBackgroundHandler);
mState = STATE_PREVIEW;
mCameraCaptureSession.setRepeatingRequest(mPreviewRequest, mCaptureCallback, mBackgroundHandler);
} catch (CameraAccessException cae){
Log.e(TAG, "unlockFocus: ", cae );
Crashlytics.log(TAG + " " + cae);
}
}
private void requestCameraPermission()
{
if (ContextCompat.checkSelfPermission(getActivity(), Manifest.permission.CAMERA) != PackageManager.PERMISSION_GRANTED){
new ConfirmationDialog().show(getChildFragmentManager(), FRAGMENT_DIALOG);
}else {
Snackbar.make(myFragmentView, "Camera Permissions Already Granted", Snackbar.LENGTH_SHORT).setAction("action", null).show();
}
}
@SuppressWarnings("SuspiciousNameCombination")
private void setUpCameraOutputs(int width, int height)
{
Log.d(TAG, "setUpCameraOutputs: ");
Activity activity = getActivity();
CameraManager manager = (CameraManager) activity.getSystemService(Context.CAMERA_SERVICE);
try{
for (String cameraID :
manager.getCameraIdList()) {
CameraCharacteristics characteristics
= manager.getCameraCharacteristics(cameraID);
Integer frontFacing = characteristics.get(CameraCharacteristics.LENS_FACING);
if (frontFacing != null && frontFacing == CameraCharacteristics.LENS_FACING_FRONT){
continue;
}
StreamConfigurationMap map = characteristics.get(
CameraCharacteristics.SCALER_STREAM_CONFIGURATION_MAP);
if (map== null){
continue;
}
android.util.Size largest = Collections.max(
Arrays.asList(map.getOutputSizes(ImageFormat.JPEG)), new CompareSizesByArea());
imageReader = ImageReader.newInstance(largest.getWidth(), largest.getHeight(),
ImageFormat.JPEG, 2);
imageReader.setOnImageAvailableListener(mOnImageAvailableListener, mBackgroundHandler);
// Find out if we need to swap dimension to get the preview size relative to sensor
// coordinate.
int displayRotation = activity.getWindowManager().getDefaultDisplay().getRotation();
//noinspection ConstantConditions
mSensorOrientation = characteristics.get(CameraCharacteristics.SENSOR_ORIENTATION);
boolean swappedDimensions = false;
switch (displayRotation) {
case Surface.ROTATION_0:
case Surface.ROTATION_180:
if (mSensorOrientation == 90 || mSensorOrientation == 270) {
swappedDimensions = true;
}
break;
case Surface.ROTATION_90:
case Surface.ROTATION_270:
if (mSensorOrientation == 0 || mSensorOrientation == 180) {
swappedDimensions = true;
}
break;
default:
Log.e(TAG, "Display rotation is invalid: " + displayRotation);
Crashlytics.log(TAG + " " + displayRotation);
}
Point displaySize = new Point();
activity.getWindowManager().getDefaultDisplay().getSize(displaySize);
int rotatedPreviewWidth = width;
int rotatedPreviewHeight = height;
int maxPreviewWidth = displaySize.x;
int maxPreviewHeight = displaySize.y;
if (swappedDimensions) {
rotatedPreviewWidth = height;
rotatedPreviewHeight = width;
maxPreviewWidth = displaySize.y;
maxPreviewHeight = displaySize.x;
}
if (maxPreviewWidth > MAX_PREVIEW_WIDTH) {
maxPreviewWidth = MAX_PREVIEW_WIDTH;
}
if (maxPreviewHeight > MAX_PREVIEW_HEIGHT) {
maxPreviewHeight = MAX_PREVIEW_HEIGHT;
}
mPreviewSize = chooseOptimalSize(map.getOutputSizes(SurfaceTexture.class),
rotatedPreviewWidth, rotatedPreviewHeight, maxPreviewWidth,
maxPreviewHeight, largest);
// We fit the aspect ratio of TextureView to the size of preview we picked.
int orientation = getResources().getConfiguration().orientation;
if (orientation == Configuration.ORIENTATION_LANDSCAPE) {
mTextureView.setAspectRatio(
mPreviewSize.getWidth(), mPreviewSize.getHeight());
} else {
mTextureView.setAspectRatio(
mPreviewSize.getHeight(), mPreviewSize.getWidth());
}
// Check if the flash is supported.
Boolean available = characteristics.get(CameraCharacteristics.FLASH_INFO_AVAILABLE);
mFlashSupported = available == null ? false : available;
mCameraId = cameraID;
return;
}
} catch (CameraAccessException e){
e.printStackTrace();
}catch (NullPointerException e){
ErrorDialog.newInstance(getString(R.string.camera_error))
.show(getChildFragmentManager(), FRAGMENT_DIALOG);
}
}
private void configureTransform(int viewWidth, int viewHeight)
{
Log.d(TAG, "configureTransform: ");
Activity activity = getActivity();
if (null == mTextureView || null == mPreviewSize || null == activity){
return;
}
int rotation = activity.getWindowManager().getDefaultDisplay().getRotation();
Matrix matrix = new Matrix();
RectF viewRect = new RectF(0,0, viewWidth, viewHeight);
RectF bufferRect = new RectF(0,0, mPreviewSize.getHeight(), mPreviewSize.getWidth());
float centerX = viewRect.centerX();
float centerY = viewRect.centerY();
if (Surface.ROTATION_90 == rotation || Surface.ROTATION_270 == rotation){
bufferRect.offset(centerX - bufferRect.centerX(), centerY - bufferRect.centerY());
matrix.setRectToRect(viewRect, bufferRect, Matrix.ScaleToFit.FILL);
float scale = Math.max(
(float) viewHeight / mPreviewSize.getHeight(),
(float) viewWidth / mPreviewSize.getWidth());
matrix.postScale(scale, scale, centerX, centerY);
matrix.postRotate(90 * (rotation - 2), centerX, centerY);
} else if (Surface.ROTATION_180 == rotation){
matrix.postRotate(180, centerX ,centerY);
}
mTextureView.setTransform(matrix);
}
private static android.util.Size chooseOptimalSize(android.util.Size[] choices, int textureViewWidth,
int textureViewHeight, int maxWidth, int maxHeight,
android.util.Size aspectRatio)
{
Log.d(TAG, "chooseOptimalSize: ");
List bigEnough = new ArrayList<>();
List notBigEnough = new ArrayList<>();
int w = aspectRatio.getWidth();
int h = aspectRatio.getHeight();
for (android.util.Size option : choices){
if (option.getWidth() <= maxWidth && option.getHeight() <= maxHeight && option.getHeight() == option.getWidth() * h / w){ if (option.getWidth() >= textureViewWidth &&
option.getHeight() >= textureViewHeight){
bigEnough.add(option);
}else {
notBigEnough.add(option);
}
}
}
if (bigEnough.size() > 0){
return Collections.min(bigEnough, new CompareSizesByArea());
} else if (notBigEnough.size() > 0 ){
return Collections.max(notBigEnough, new CompareSizesByArea());
}else {
Log.e(TAG, "chooseOptimalSize: couldnt find suitable preview size");
Crashlytics.log(TAG + " " + "chooseOptimalSize: couldnt find suitable preview size");
return choices[0];
}
}
// TODO: 6/1/2018 set auto flash
//endregion
//region------------------------------------------------------------------- Lesser Methods
private void showToast(final String text)
{
Log.d(TAG, "showToast: ");
final Activity activity = getActivity();
if (activity != null){
activity.runOnUiThread(new Runnable() {
@Override
public void run() {
Toast.makeText(activity, text, Toast.LENGTH_SHORT).show();
}
});
}
}
@Override
public void onRequestPermissionsResult(int requestCode, @NonNull String[] permissions, @NonNull int[] grantResults) {
super.onRequestPermissionsResult(requestCode, permissions, grantResults);
}
private void startBackgroundThread()
{
Log.d(TAG, "startBackgroundThread: ");
mBackgroundThread = new HandlerThread("CameraBackground");
mBackgroundThread.start();
mBackgroundHandler = new Handler(mBackgroundThread.getLooper());
}
private void stopBackgroundThread()
{
Log.d(TAG, "stopBackgroundThread: ");
mBackgroundThread.quitSafely();
try {
mBackgroundThread.join();
mBackgroundThread = null;
mBackgroundHandler = null;
} catch (InterruptedException e) {
e.printStackTrace();
}
}
private boolean notToBusyToComply()
{
Log.d(TAG, "notToBusyToComply: ");
return ((MainActivity)getActivity()).notToBusyToComply();
}
//endregion
//region------------------------------------------------------------------- LifeCycle
@Override
public void onResume() {
super.onResume();
startBackgroundThread();
if (mTextureView.isAvailable()) {
openCamera(mTextureView.getWidth(), mTextureView.getHeight());
} else {
mTextureView.setSurfaceTextureListener(mSurfaceTextureListener);
}
}
@Override
public void onPause() {
closeCamera();
stopBackgroundThread();
super.onPause();
}
@Override
public void onDestroyView() {
super.onDestroyView();
//RefWatcher refWatcher = EasyReceipt.getRefwatcher(getActivity());
//refWatcher.watch(this);
}
//endregion
//region------------------------------------------------------------------- Inner Classes
private class ImageSaver implements Runnable{
private final Image mImage;
private final FileManager mFileManager;
//private final File mFile;
ImageSaver(Image image, FileManager fileManager){
mImage = image;
mFileManager = fileManager;
//mFile = file;
}
@Override
public void run() {
File outputFile = null;
try {
outputFile = File.createTempFile(String.valueOf(System.currentTimeMillis()), ".jpg", getActivity().getCacheDir());
}catch (Exception e){
Log.e(TAG, "run: ", e);
Crashlytics.log(TAG + " " + e);
}
ByteBuffer buffer = mImage.getPlanes()[0].getBuffer();
byte[] bytes = new byte[buffer.remaining()];
buffer.get(bytes);
FileOutputStream fos = null;
try{
fos = new FileOutputStream(outputFile);
fos.write(bytes);
}catch (Exception e){
Log.e(TAG, "run: ", e);
Crashlytics.log(TAG + " " + e);
}finally {
mImage.close();
if (fos != null){
try{
fos.close();
}catch (Exception e){
Log.e(TAG, "run: ", e);
Crashlytics.log(TAG + " " + e);
}
}
}
((MainActivity)getActivity()).setUriofImageTOReview(Uri.fromFile(outputFile));
((MainActivity)getActivity()).loadCameraPreviewApprovalFrag();
/*
((MainActivity)getActivity()).loadCameraPreviewApprovalFrag(bytes);
mImage.close();
*/
}
}
static class CompareSizesByArea implements Comparator {
@Override
public int compare(android.util.Size lhs, android.util.Size rhs) {
// We cast here to ensure the multiplications won't overflow
return Long.signum((long) lhs.getWidth() * lhs.getHeight() -
(long) rhs.getWidth() * rhs.getHeight());
}
}
public static class ErrorDialog extends DialogFragment {
private static final String ARG_MESSAGE = "message";
public static ErrorDialog newInstance(String message){
ErrorDialog dialog = new ErrorDialog();
Bundle args = new Bundle();
args.putString(ARG_MESSAGE, message);
dialog.setArguments(args);
return dialog;
}
@NonNull
@Override
public Dialog onCreateDialog(Bundle savedInstanceState) {
final Activity activity = getActivity();
return new AlertDialog.Builder(activity)
.setMessage(getArguments().getString(ARG_MESSAGE))
.setPositiveButton(android.R.string.ok, new DialogInterface.OnClickListener() {
@Override
public void onClick(DialogInterface dialogInterface, int i) {
activity.finish();
}
}).create();
}
}
public static class ConfirmationDialog extends DialogFragment{
@NonNull
@Override
public Dialog onCreateDialog(Bundle savedInstanceState)
{
final Fragment parent = getParentFragment();
return new AlertDialog.Builder(getActivity())
.setMessage(R.string.request_permission)
.setPositiveButton(android.R.string.ok, new DialogInterface.OnClickListener() {
@Override
public void onClick(DialogInterface dialogInterface, int i) {
ActivityCompat.requestPermissions(getActivity(), new String[]{Manifest.permission.CAMERA}, REQUEST_CAMERA_PERMISSIONS);
}
})
.setNegativeButton(android.R.string.cancel, new DialogInterface.OnClickListener() {
@Override
public void onClick(DialogInterface dialogInterface, int i) {
Activity activity = parent.getActivity();
if (activity != null){
activity.finish();
}
}
}).create();
}
}
//endregion
}
2) Create a method where you can pass an image and probably a countdown latch
3) The using the firebase api create an Image Input Object, a Detector Object and an on success listener.
Thats it! But you may notice two things
A) I used a countdown latch. My text recognition ran in an Intent Service completely separate from the UI and this allowed me to halt the overall parsing strategy to wait for the Vision Results.
B) Googles API returns a vision object but this object was not serializable so I made a serialize-able version and did he conversion myself. The vision result gives you a box where you can easily detect its location and size on the screen and therefore make critical decisions about what information you are looking at.
For example the vendors name is often larger and directly adjacent the phone number or address. These two factors alone will give you the correct vendor with startling accuracy.
Or for example the price is usually on the right lower half (localization excluded).
Anyways, I enjoyed using it and its always fun to stand on somebody else’s shoulders when building your project. Thanks Google
Using google firebase vision text on android app easy receipt