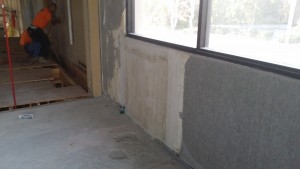

This job was in Torrance California. It was a concrete wall infill on a tilt up warehouse. I wish I had better pictures of this job. Even better I wish I had picture of the larger 10′ x 15′ openings I have closed in the past.
When doing a large permanent infill I typically form it an pour it. This is done by drilling, doweling and setting rebar reinforcement with epoxy. Embed depth and rebar size can vary from opening to opening but I recommend overdoing it because this concrete will be standing straight up and down and will weigh 150 lbs per cubic foot.
Next I form the wall area. This job used 1/2 plywood and 2×4 wood. On larger job I would use 3/4 plywood and 4×4 or even 4×6 lumber.
When pouring into plywood its best to have waxed forms. But often I will instead just spray water onto the plywood interior and order a high slump concrete. That along with the vibrator will leave your with only a very few 1/2 air bubbles in some if the tighter corners.
Because finishing is done after forming you can order the mic with an accelerator such as calcium chloride. This will allow you to build forms and pour the same day. Then you can come back the next day, remove the forms and begin finishing the concrete.
At this point the concrete will still be “green” meaning still curing significantly. It will not be fulled hardened and will be warm to the touch. However I will begin grinding and high spots and then sacking concrete to finish it. I don’t use a traditional sand and cement mixture for painted walls. Instead I will use a bag of “cement all” to fill large voids and “one pass” to finish the wall for paint.
One pass in nice because its a hydraulic cement product that binds like cement but dries quickly and can be sanded to give a great finish in less time. Most job are single infills and completing them in only two days is a major plus to the business owner who’s operations are never helped by on-site construction activities.
Powered by WPeMatico