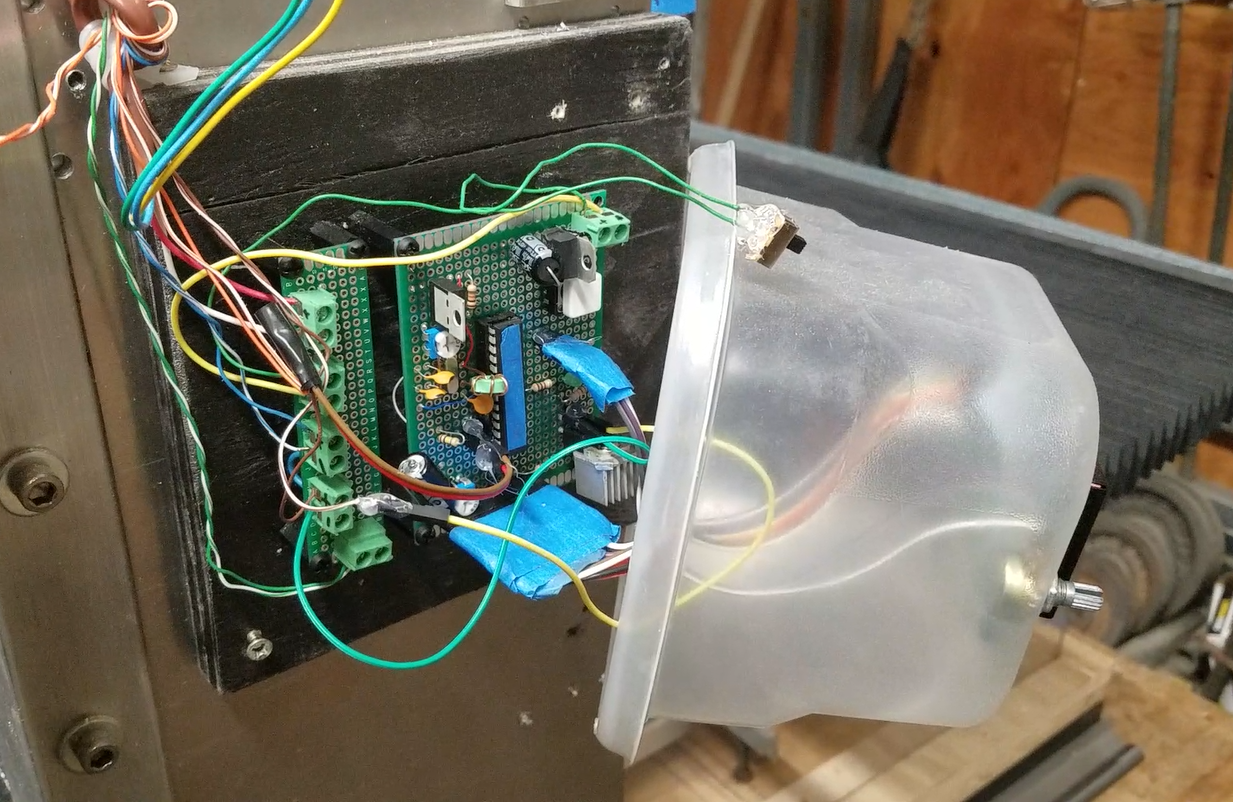
So I decided to build my own temperature control unit. Here is my, Errrr masterpiece.

Here is the layout of my circuit board.

This layout above doesn’t show some things on my board like my voltage regulator for 5v power or my electrolytic and ceramic capacitors plus inductor for decoupling. I realized I needed those after I had mounted all this. YIKES!!

My micro controller has 3 tasks on a continuous loop.
1- Check the temperature of the thermistor
2- Use a mosfet and pwm to adjust the heating element
3- Check a potentiometer to determine user input of target temperature
4- Update the screen
Here is my current code. I plan on changing it in the near future but even if I forget this may help someone get a bit closer in the right direction
// include the library code:
#include <LiquidCrystal.h>
#include <SmoothThermistor.h>
#include <PID_v1.h>

LiquidCrystal lcd(12, 11, 5, 4, 3, 2);
SmoothThermistor smoothThermistor(A0,
 ADC_SIZE_10_BIT,
 100000,
 100000,
 3950,
 25,
 10);


double actualTemp;
double detectedTemp;
double outputPWM;
 double desiredTemp;
 long previousMillis = 0;
 long interval = 1000;
int mosfetPin = 6;

PID myPID(&detectedTemp, &outputPWM, &desiredTemp,2,7,1, DIRECT);


void setup() {
 // put your setup code here, to run once:

 //some communications crap
 Serial.begin(9600);


 //thermistor


 //mosfet controll
 pinMode(mosfetPin, OUTPUT);


//PID
myPID.SetMode(AUTOMATIC);

 // LCD set up
 lcd.begin(20, 4); // this is setup nt line selection
 lcd.print("Temperature is : ");
 lcd.setCursor(0,2);
 lcd.print("Target Temp set at : ");


}

void loop() {
 // put your main code here, to run repeatedly:

 unsigned long currentMillis = millis();

if (currentMillis - previousMillis > interval)
{
 previousMillis = currentMillis;

 smoothThermistor.temperature();
 detectedTemp = smoothThermistor.temperature();

 //create an average to display and run off of
 averageTemp();


 //Read Desired Temperature
 tempReading();


 // set the cursor to column 0, line 1
 lcd.setCursor(0, 1);
 //show current temp
 lcd.print(actualTemp);

 lcd.setCursor(7, 1);
 //show current temp
 lcd.print("C");

 //attempt to adjust temp
 adjustTemp();


}


}

void adjustTemp()
{

if (desiredTemp > (detectedTemp + 15))
{
 analogWrite(mosfetPin, 255);
 lcd.setCursor(9, 1);
 lcd.print("high");


}

else if (desiredTemp < (detectedTemp -3))
{
 analogWrite(mosfetPin, 0);
 lcd.setCursor(9, 1);
 lcd.print("-off");


}

else
{
 myPID.Compute();
 //Serial.print("PID # : ");
 //Serial.println(outputPWM);
 analogWrite(mosfetPin, outputPWM);
 lcd.setCursor(9, 1);
 lcd.print("-PID");


}

}

void tempReading()
{
 int value = analogRead(A1);

 //Serial.print(value);

 value = map(value, 0,1023, 25, 250);

 desiredTemp = value;


 if (value > 99)
 {
 lcd.setCursor(0, 3);
 lcd.print(value);
 }

 if (value < 99)
 {
 lcd.setCursor(0, 3);
 lcd.print(0);
 lcd.setCursor(1, 3);
 lcd.print(value);
 }

 lcd.setCursor(5, 3);
 lcd.print("Celcius");
}


void averageTemp()
{
 // Serial.print("actual temp 1 ");
 //Serial.println(actualTemp);
 if (actualTemp < 10)
 {
 actualTemp = detectedTemp;
 //Serial.print("actual temp 2 ");
 // Serial.println(actualTemp);
 }

 double temp = actualTemp + detectedTemp;

 actualTemp = temp/2;

 // Serial.print("detected temp ");
 //Serial.println(detectedTemp);

 //Serial.print("actual temp ");
 //Serial.println(actualTemp);
 //Serial.println(" ");
 // Serial.println(" ");

}
The post Building the 3D Printer Temperature control from an arduino prototype appeared first on SignalHillTechnology.
Powered by WPeMatico